Welcome to PageFinder!
Your comprehensive guide to getting started with document search and organization
Step 1: Sign Up and Login
Before you can start using PageFinder, you need to create a free account and log in.
Creating Your Account:
- 1 Visit the Sign Up Page: Click "Sign up here" on the login screen
- 2 Choose Your Method: Sign up with Google (fastest) or create a username and password
- 3 Verify Your Email: Check your email for a verification link and click it to activate your account
- 4 Complete Your Profile: Once verified, log in and you're ready to start!
Logging In:
- 1 Google Sign-In: Click "Continue with Google" for quick access using your Google account
- 2 Username/Password: Use your registered username and password
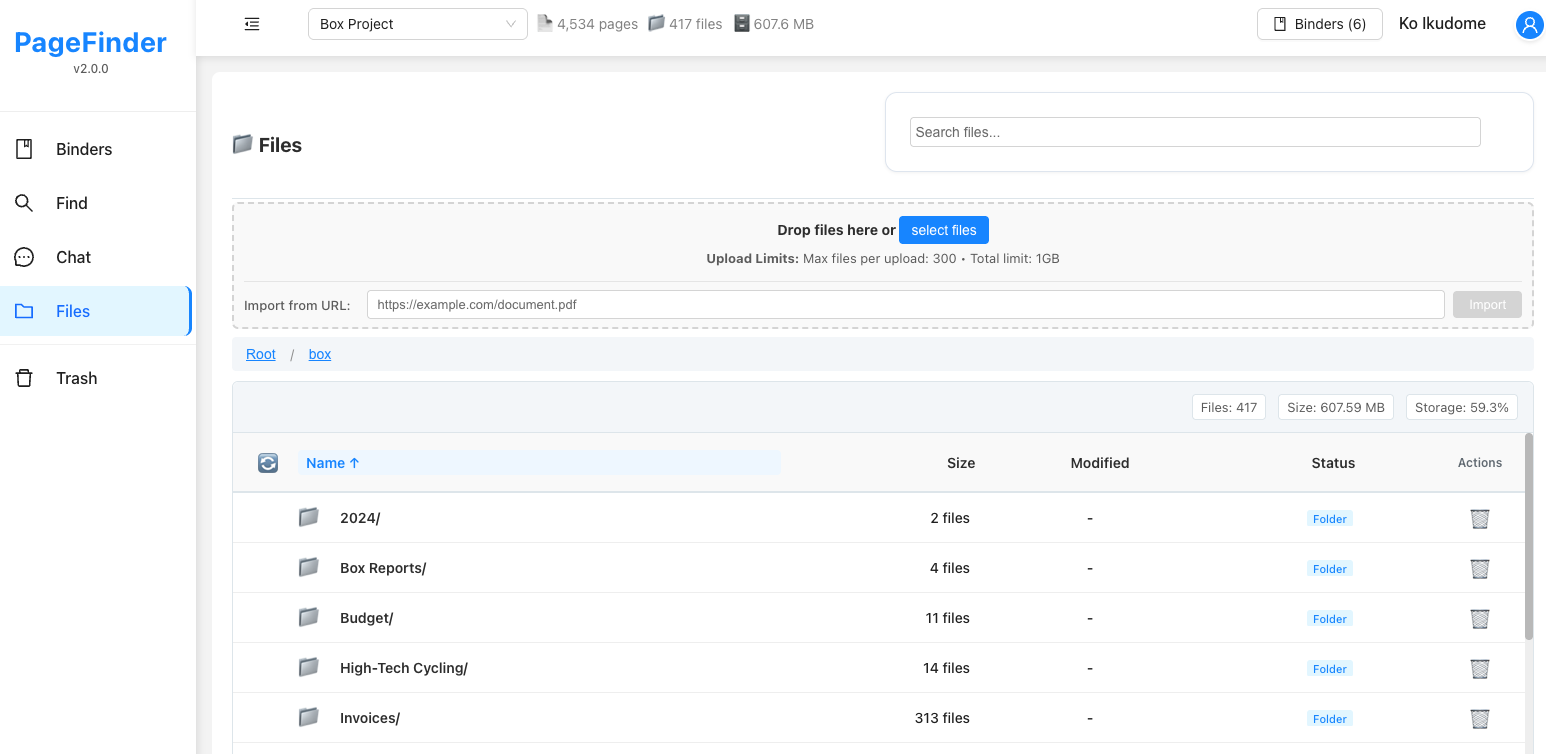
Step 2: Upload and Manage Your Documents
Once logged in, the first step is to upload documents that you want to search and chat with.
Uploading Documents:
- 1 Navigate to Files: Look for the upload button or drag-and-drop area in the interface
- 2 Select Your Files: Choose files to upload (PDF, DOCX, TXT, XLSX, PPTX, JPEG, PNG formats supported)
- 3 Wait for Processing: Your documents will be indexed for search. This may take a few moments to several minutes depending on file size
- 4 Verify Processing Status: Check that documents show as "Processed" before searching
Step 3: Import from Cloud Storage (Optional)
In addition to uploading files directly, you can import documents from your cloud storage accounts including Google Drive, OneDrive, or Box.
Importing from Cloud Storage:
- 1 Navigate to Cloud: Click on the Cloud icon in the sidebar to access cloud storage import
- 2 Choose Your Provider: Select from Google Drive, OneDrive, or Box - all are supported with verified security
- 3 Authorize Access: Click "Connect" and sign in to your cloud storage account to grant PageFinder temporary read access
- 4 Select Folders: Choose which folders you want to import to PageFinder
- 5 Start Import: Click "Sync Now" to import documents from your selected folders. You'll receive an email notification when the import is complete
- 6 Review Sync Logs: After each sync operation, check the sync log to verify which files were imported, any errors encountered, and the overall status. Logs are available in the Cloud interface and provide a detailed record of each sync operation for transparency and troubleshooting
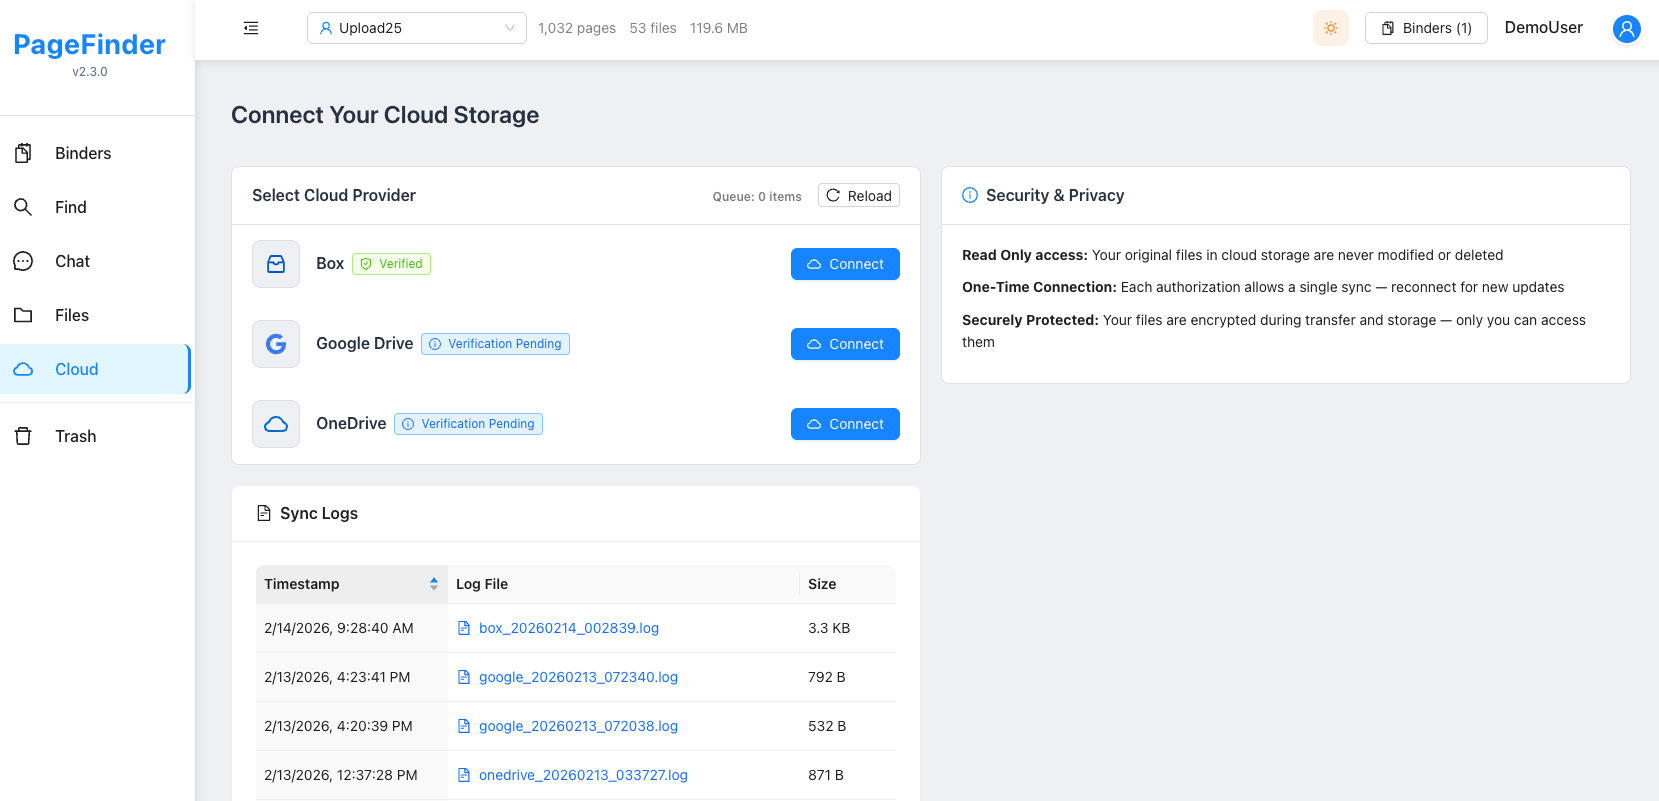
🔒 Security Note: One-Time Connection
For your security, PageFinder does not store your cloud storage credentials or connection tokens. Each time you want to import new files, you'll need to authorize access again. This ensures your cloud accounts remain secure.
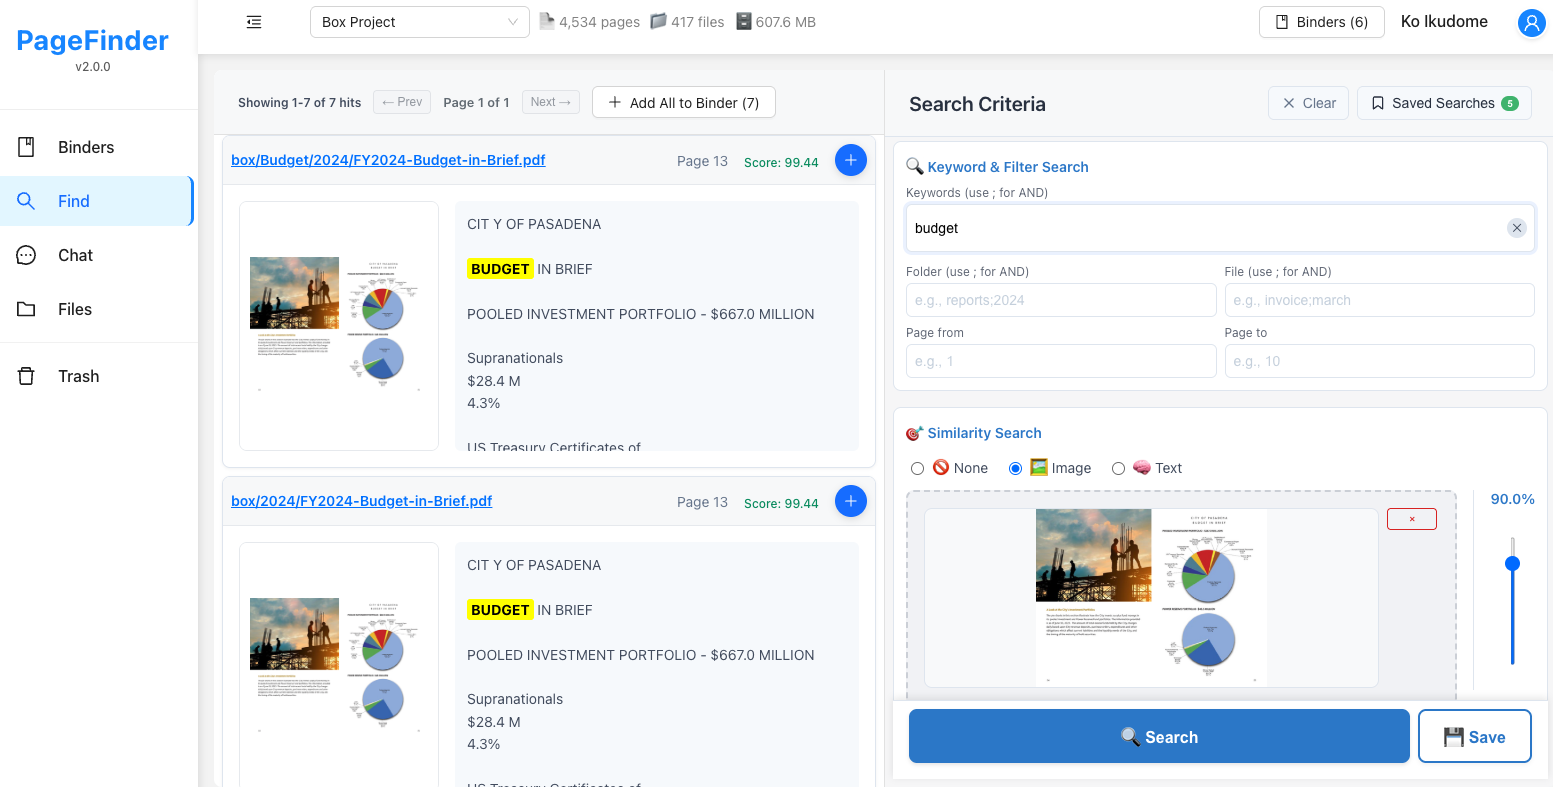
Step 4: Find Exact Pages
Once your documents are processed, you can search to pinpoint specific pages using multiple methods.
Types of Searches:
- 1 Keyword Search: Enter specific words or phrases to find exact text matches in your documents
- 2 Image Similarity Search: Upload a reference image to find visually similar pages (perfect for finding matching charts, diagrams, layouts, or visual patterns). Use the score slider to adjust the similarity threshold - higher scores return only very similar matches, while lower scores cast a wider net
- 3 Text-to-Image Search: Describe what you're looking for in words and find pages with matching visual content (e.g., "bar chart showing sales data" or "photo of a building")
- 4 Advanced Filters: Narrow your search by folder, file name, or specific page ranges to quickly find exactly what you need
- 5 Save Search Criteria: Save your search filters and criteria for future reuse. Perfect for recurring searches - just load your saved search instead of recreating filters each time
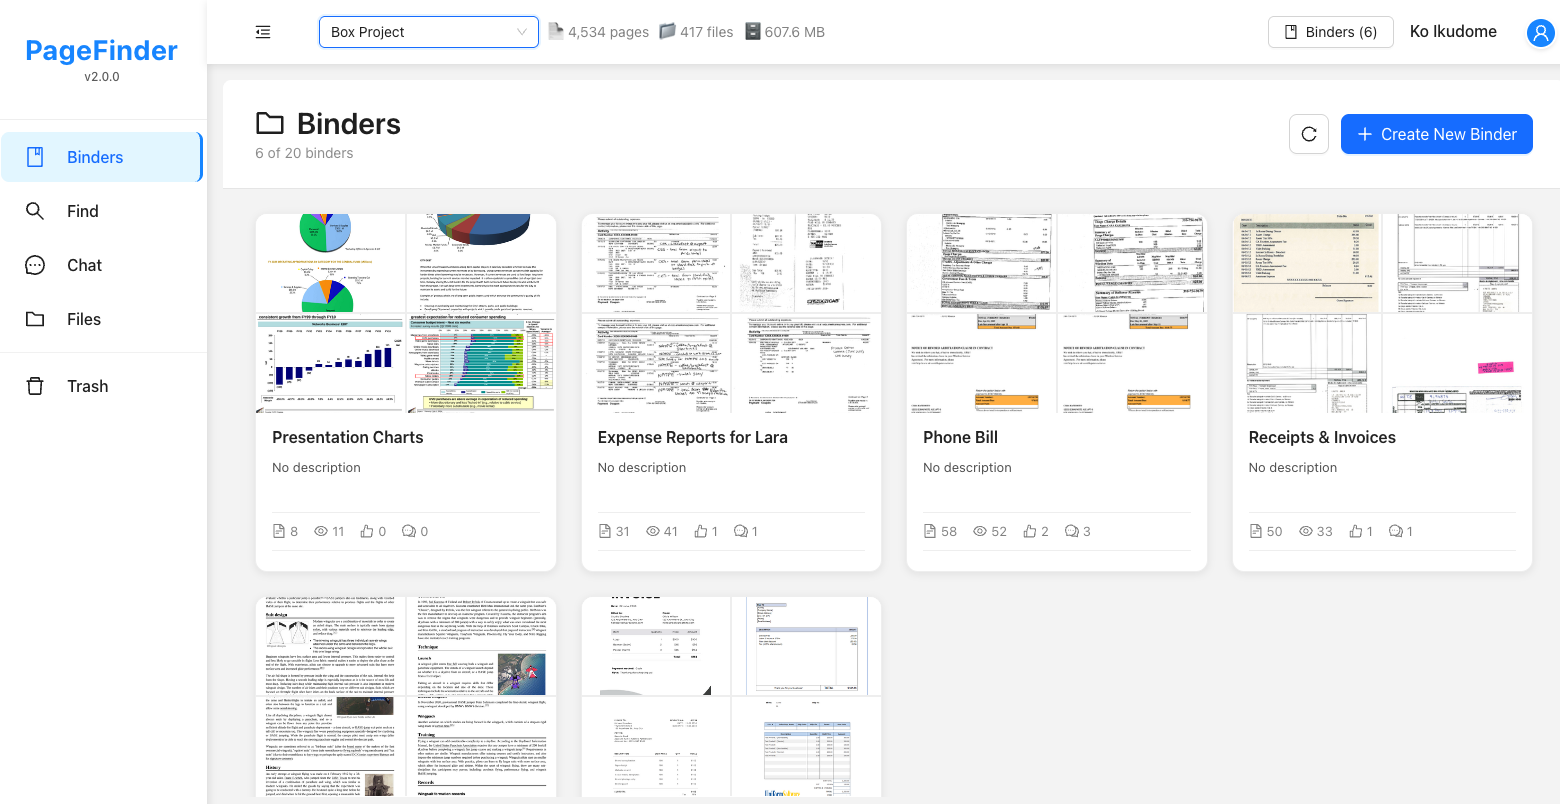
Step 5: Create Binders and Organize Pages
After finding relevant pages through search, you can organize them into binders. Binders help you collect and organize pages from different documents into meaningful collections for easy access and management.
Creating and Using Binders:
- 1 Click the "Create New Binder" button in the Binders view
- 2 Give your binder a descriptive name (e.g., "Presentation Charts", "Expense Reports", "Phone Bills")
- 3 Add documents to your binder by selecting files or dragging and dropping
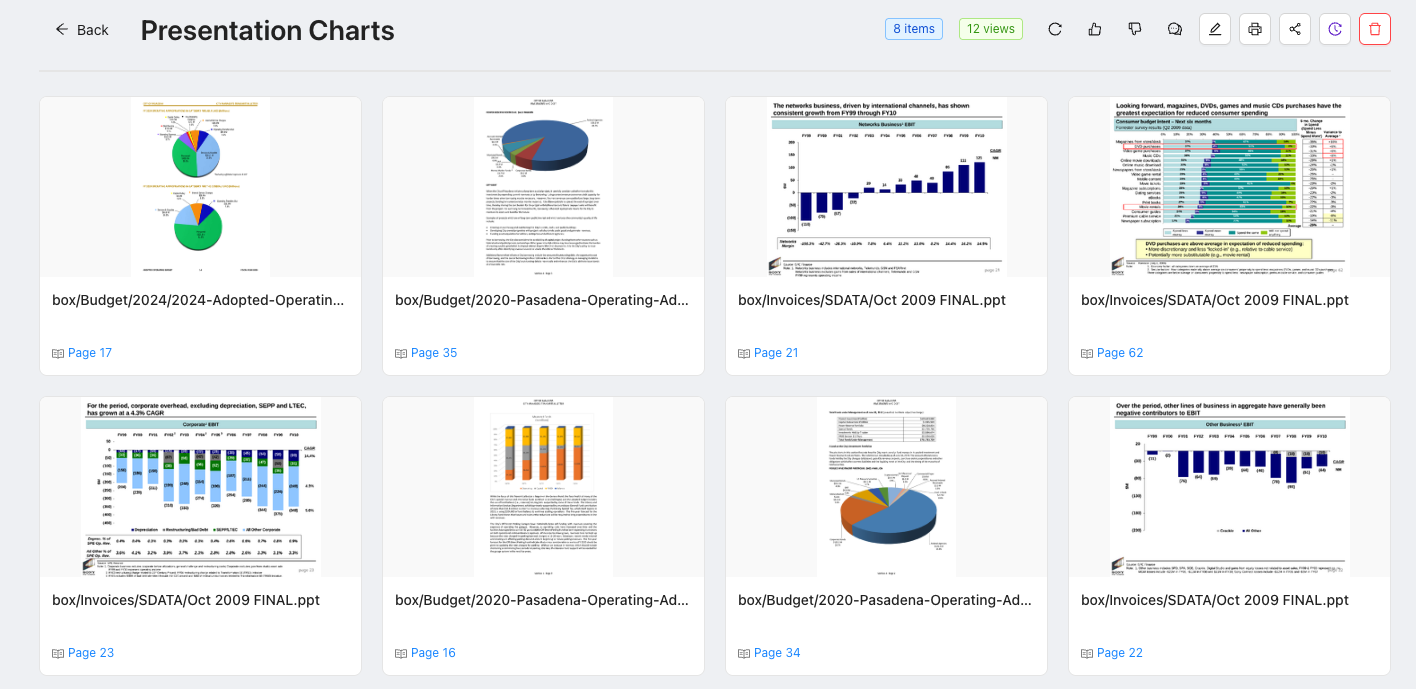
- 4 View all documents in a binder with thumbnail previews and page counts
Adding Pages to Binders:
There are multiple ways to add pages to your binders:
- 1 From Search Results: When viewing search results, click the "+" (plus) button next to any page to add it to an existing binder or create a new one
- 2 Add All Results: Use the "Bind All" button above search results to add multiple pages to a binder at once (up to 10 pages)
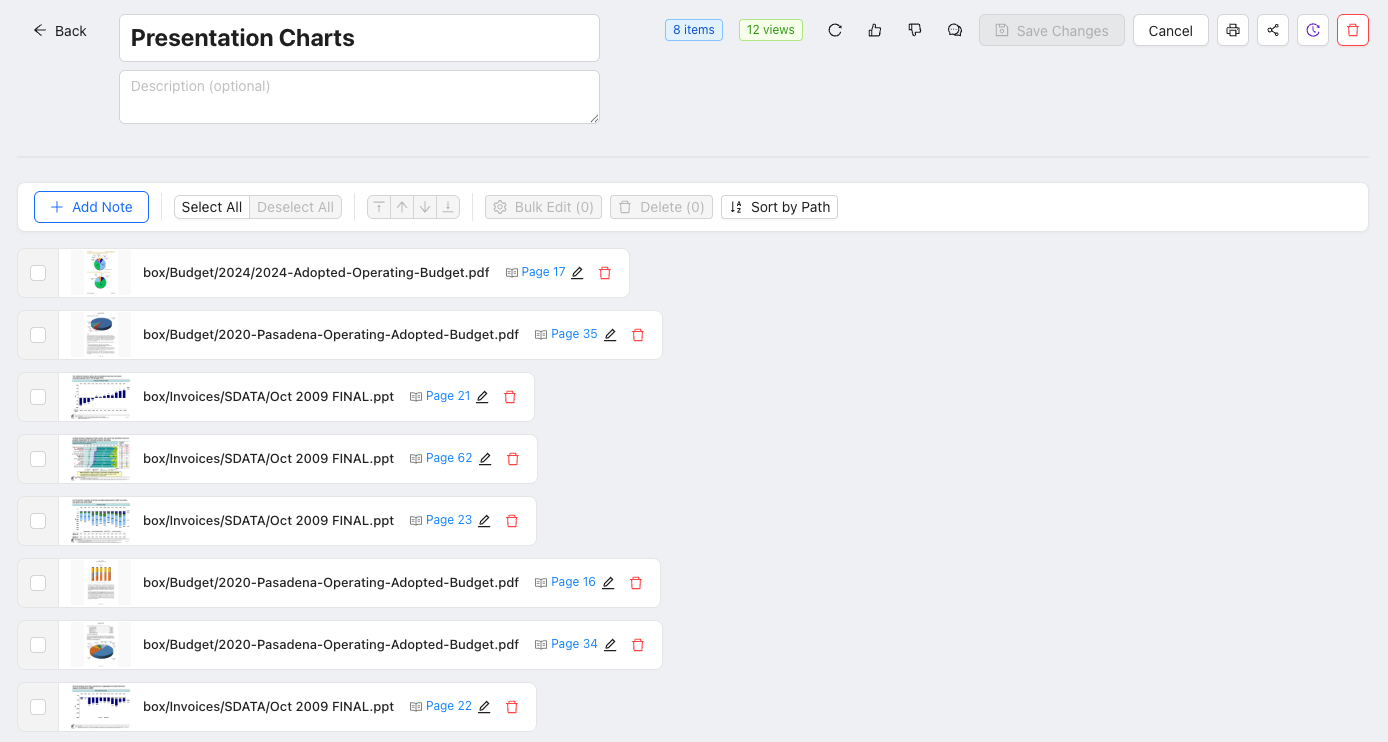
Customizing Page Items:
Each page item in a binder can be customized for better organization and visual clarity:
- 1 Page Range Selection: Include not just single pages but page ranges (e.g., pages 5-10) or even entire documents in one item. This is useful when related content spans multiple pages
- 2 Hide Items: Temporarily hide page items from view without deleting them
- 3 Add Notes: Click on any page item to add notes and annotations for context
- 4 Change Card Colors: Assign different colors to page cards for visual categorization and quick identification
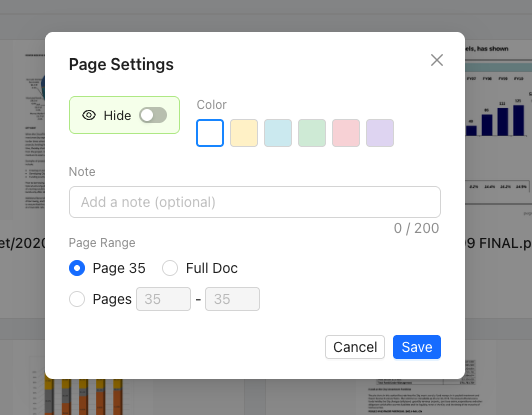
The edit subwindow for customizing page items
Binder Management Functions:
Each binder has powerful management tools accessible from the binder view:
- 1 View Statistics: Track page counts, view counts (shown as tags above the binder), and like/comment counts
- 2 Edit Binder (Edit icon button): Click the edit icon to rename the binder, update descriptions, and modify binder settings
- 3 Print (Printer icon button): Export the entire binder as a single PDF file, including all pages with your notes and annotations
- 4 Share (Share icon button): Generate shareable links to collaborate with others. The button turns green when the binder is already shared
- 5 Snapshots (History icon button): Save and load different versions of your binder
- 6 Delete (Delete icon button - red): Remove the binder (does not delete original documents)

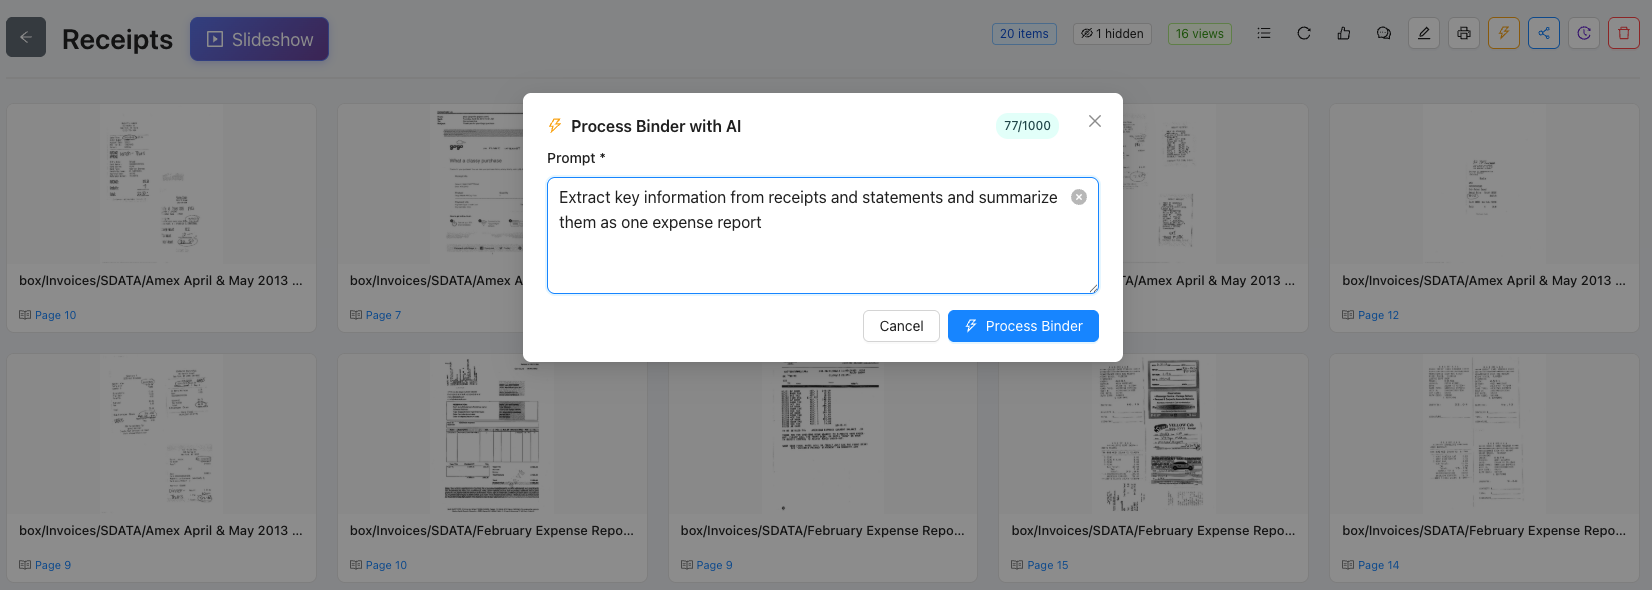
Step 6: Process Binder with AI
Once you've organized pages into a binder, you can use AI to analyze and understand the collected content. This powerful feature lets AI read through all pages in your binder and generate insights, summaries, or answer specific questions about the content.
How to Process a Binder with AI:
- 1 Open Your Binder: Navigate to the binder you want to analyze
- 2 Click the Robot Icon Button: Find the cyan gradient button with a robot icon in the binder management toolbar
- 3 Enter Your Prompt: Type your question or request. Be specific about what you want the AI to focus on
- 4 Start Processing: Click the process button and wait for the AI to analyze all pages
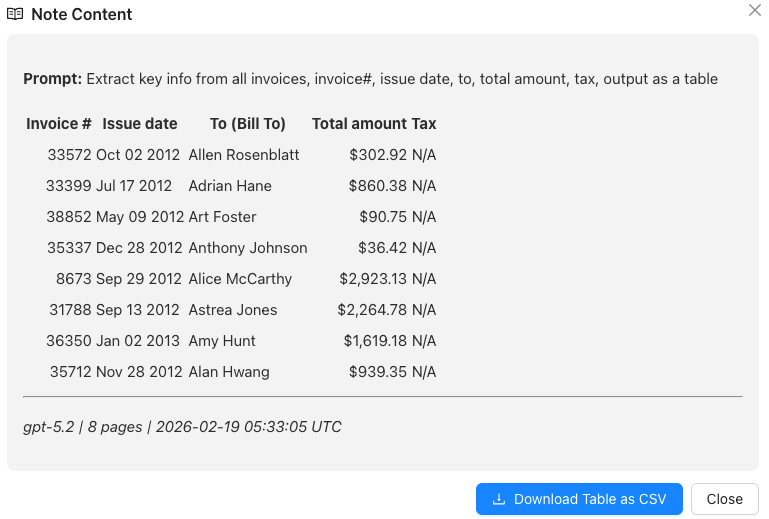
- 5 Review Results: The AI-generated analysis will be saved as a note in your binder with source references
Use Cases for AI Processing:
Document Summaries
Generate comprehensive summaries of multiple documents in one binder
Comparative Analysis
Compare data across multiple documents and identify patterns or differences
Research Synthesis
Synthesize information from research papers or technical documents
Data Extraction
Extract specific information like dates, numbers, or key facts from multiple pages
Step 7: Share Binders
PageFinder makes it easy to share your organized binders with others.
Sharing Binders:
- 1 Open a Binder: Navigate to the binder you want to share
- 2 Click Share: Look for the share button or icon in the binder view
- 3 Generate Link: Create a shareable link that others can access
- 4 Set Permissions: Control whether recipients can view only or also edit the binder
- 5 Send Link: Share the link via email, messaging, or any communication method
Navigating the Interface
Main Components:
- 1 Header: Contains your profile, settings, and main navigation
- 2 Sidebar: Quick access to files, search, and chat features
- 3 Main Area: Displays search results, chat conversations, or document management interface
- 4 File Panel: Shows your uploaded documents in an organized list
Troubleshooting
Common Issues:
Login Problems
Try refreshing the page, clearing cache, or using "Forgot Password" if needed
Upload Failures
Check file format (PDF, DOCX, TXT, XLSX, PPTX, JPEG, PNG), file size limits, and internet connection
Search Not Working
Ensure documents are fully processed (check status indicators)
Privacy & Security
Your Data Protection:
- 1 Secure Authentication: Login protected by AWS Cognito
- 2 Encrypted Storage: Your documents are securely stored and encrypted
- 3 Private Access: Only you can access your uploaded documents
- 4 Data Control: You can delete your documents anytime
Ready to Get Started?
You now have everything you need to make the most of PageFinder!
Close Tutorial